On the road and at home, it's always about food and fun!
Author: Jane Simon Ammeson
Jane Simon Ammeson is a freelance writer who specializes in travel, food and personalities. She writes frequently for The Times of Northwest Indiana, Mexico Connect, Long Weekends magazine, Edible Michiana, Lakeland Boating, Food Wine Travel magazine , Lee Publications, and the Herald Palladium where she writes a weekly food column. Her TouchScreenTravels include Indiana's Best. She also writes a weekly book review column for The Times of Northwest Indiana as well as food and travel, has authored 16 books including Lincoln Road Trip: The Back-road Guide to America's Favorite President, a winner of the Lowell Thomas Journalism Award in Travel Books, Third Place and also a Finalist for the 2019 Foreword INDIES Book of the Year Awards in the Travel category. Her latest books are America's Femme Fatale: The Story of Serial Killer Belle Gunness and Classic Restaurants of Northwest Indiana.
Her other books include How to Murder Your Wealthy Lovers and Get Away with It, A Jazz Age Murder in Northwest Indiana and Murders That Made Headlines: Crimes of Indiana, all historic true crime as well Hauntings of the Underground Railroad: Ghosts of the Midwest, Brown County, Indiana and East Chicago. Jane’s base camp is Stevensville, Michigan on the shores of Lake Michigan. Follow Jane at facebook.com/janesimonammeson; twitter.com/hpammeson; https://twitter.com/janeammeson1; twitter.com/travelfoodin, instagram.com/janeammeson/ and on her travel and food blog janeammeson.com and book blog: shelflife.blog/
Help celebrate the James Beard Media Awards winners by tuning in on a series of conversations that’s free and open to the public. The next one, scheduled for August 26th from 1:30 to 2:30 p.m. ET, gives food entusiasts the opprotunity to ask James Beard Award–winning Wok Therapist and Stir Fry Guru Grace Young all of your burning wok questions.
Young helps us ease our anxieties about using a wok. This conversation will also delve into how COVID-19 has affected Chinese restaurants and communities across the nation.
Grace Young. Courtesy of graceyoung.com
A little background. Dubbed “The Stir-Fry Guru” by the New York Times, Young has devoted her career to celebrating wok cookery through her cookbooks and videos. On March 15, 2020, she began Coronavirus: Chinatown Stories, an oral history project with videographer Dan Ahn, in collaboration with Poster House, documenting the stories of how Manhattan’s Chinatown has been impacted by COVID-19. The Smithsonian National Museum of American History featured Coronavirus: Chinatown Stories in their 2020 Youth Summit for middle and high school students as an exemplar of how one person is addressing the challenging question of how we choose to strengthen a community in the middle of a pandemic.
12 ounces boneless pork belly, cut in half 1 1/2 teaspoons sugar 3/4 teaspoon salt 1 tablespoon XO sauce 1/4 teaspoon sesame oil 1 1/2 teaspoons chili bean sauce 1/4 teaspoon chili oil 3 slices ginger 3 scallions, cut into 2-inch pieces 3 tablespoons Shao Hsing rice wine or dry sherry 2 tablespoons olive oil 1 tablespoon minced garlic 1/2 medium red bell pepper, cut into 1-inch cubes 1/2 medium yellow bell pepper, cut into 1-inch cubes 1/2 medium green bell pepper, cut into 1-inch cubes
One 8-ounce can sliced bamboo shoots, rinsed and drained
Put the pork in a dish and sprinkle with 1/2 teaspoon of the sugar and 1/2 teaspoon of the salt. Set aside 30 minutes. In a small bowl combine the XO sauce, sesame oil, chili bean sauce, and chili oil.
In a 14-inch flat-bottomed wok bring 2 cups water to a boil over high heat. Add the ginger slices and scallions and boil 1 minute. Add 1 tablespoon of the rice wine and boil 1 minute. Add the pork, cover, and reduce the heat to low. Simmer 8 minutes. Pour out the water and seasonings. Rinse the pork in cold water, put it on a cutting board, and cut into 1/4-inch-thick bit-sized slices. The pork should still be slightly pink. Rinse the wok and dry it thoroughly.
Heat the wok over high heat until a bead of water vaporizes within 1 to 2 second of contact. Swirl in the olive oil and garlic and stir-fry 15 seconds. Cover, reduce the heat to medium, and a cook 1 minute. Increase the heat to high, add the peppers and bamboo shoots, and stir-fry 1 minute. Add the remaining 1 teaspoon sugar and 1/4 teaspoon salt and stir-fry 1 minute. Add the remaining 2 tablespoons rice wine and continue to stir-fry 1 minute. Serves 4 as part of a multicourse meal.
It’s almost dinner time and you haven’t thought of anything to cook and haven’t been to the store or farm stand, so what do you do? Well, if you’re Jessica Elliot Dennison, a food writer and stylist as well as owner of 27 Elliot’s, a neighborhood café, workshop and supper club in Edinburgh, Scotland, you just open the pantry.
Since I’ve frequently been in that position, hungry people waiting and no prior planning, I was intrigued when my friend Grace Jensen sent me a copy of Dennison’s latest cookbook, “Tin Can Magic: Easy, Delicious Recipes Using Pantry Staples” (Hardie Grant 2020; $16.99). The premise is that a great meal is just a can opener away.
Sure, it helps that Dennison has quite a culinary background having been part of Jamie Oliver’s retail marketing team, responsible for his 1000-product food and homeware range and that her first cookbook, “Salad Feasts: How to Assemble the Perfect Meal” was a best seller. Indeed, the inspiration for “Tin Can Magic” came from repeated mentions by fans of her first book that the recipes they cooked the most frequently were the ones fans where the main ingredients were already on hand.
So, using nine different tins (that’s what they call them in the United Kingdom, we say cans) of such ingredients as tomatoes, butter beans, sweet corn, cherries, coconut milk, green lentils, anchovies, chickpeas and condensed milk, Dennison came up with more than 60 recipes. Since anchovies aren’t high on many people’s lists of favorite ingredients (I actually like them), I guess we could say there are really eight tins we can use to create meals—unless you’re willing to give anchovies a try.
Dennison doesn’t want us to have to run to the grocery store when making these last minute meals, so she offers lists of substitutions we can use. For example, in the introduction to her recipe for Tomato Butter Sugo with Fettucine and Feta, she notes that it’s the first sauce they teach at their pasta workshop evenings as a way of illustrating how even the simplest of store cupboard ingredients can be turned into something truly comforting and spectacular.
“Fettucine is my go-to pasta for this rich butter sugo,” she says. “But by all means, just cook whatever pasta you’ve got to hand.”
Sugo, In case you’re wondering as I was, is a traditional Italian red sauce and the word means sauce’ in Italian.
There’s an ethnic flair to many of her recipes such as Chili Ramen-Style Noodles with Spicy Tuna and Spring Onion, Crispy Coconut Milk Pancakes with Shrimp and Garlic Vinegar and Cumin and Sesame Roast Chicken Thighs, Silky Butter Bean Hummus, Charred Lemon and Toasted Almond and more familiar ones such as Roasted Pepper, Tomato and Lentil Soup, Cornbread Loaf with Cumin and Chili Loaf and Set Lemon Pudding , a four ingredient dessert made with condensed milk that’s similar to an Italian panna cotta only much easier.
INDIAN-STYLE CREAMED CORN with Naan, Coriander and Toasted Spices
“This is halfway between a dahl and a curry, where a few tins of regular sweetcorn are transformed into something fragrant and special by the help of the spices from the back of your cupboard,” writes Dennison in a forward to this recipe. “I’ve suggested using a stick blender to give your corn a nice creamy texture, but if you don’t have one, don’t worry, just mash some of the corn by hand using a potato masher instead.”
SERVES 2 25 minutes 6 tablespoons rapeseed (canola), light olive or coconut oil 1 onion, peeled and finely sliced 3 garlic cloves, peeled and finely sliced 11½ ounces) tins of sweetcorn, drained 2 teaspoons ground coriander 1 ½ teaspoons ground cumin 1 tablespoon curry leaves (optional) ½ – 1 teaspoon of dried chili (hot pepper) flakes (depending on how spicy you want it) 1 lemon Sea salt flakes 1 large naan or 2 chapatis Handful of cilantro leaves
SUBSTITUTES Onion: Leek Ground coriander: Garam masala Lemon: Lime
First, heat 4 tablespoons of oil over a medium heat in a wide pan. Add the onion and garlic, reduce to low, then fry for 15 minutes until soft and translucent. Stir occasionally and add a splash of water if beginning to catch.
Add half the corn to a jug with a splash of water. Then, using a stick blender or food processor, blitz into a rough pulp.
Add 2 tablespoons of oil to the onion, then add the spices and curry leaves. Stir for 1–2 minutes until fragrant, then add the creamed corn and reserved kernels. Add the zest of one lemon and the juice of half, plenty of seasoning to taste, and a splash of water to loosen if it’s too thick. Cut the remaining lemon half into wedges.
Meanwhile, use tongs to heat the naan bread directly over a gas flame for a few seconds until lightly charred. You can also do this in a hot pan or oven.
To assemble:
Divide the corn and naan between two plates. Roughly tear over the coriander and serve with a lemon wedge each.
Tomato Butter Sugo with Fettucine and Feta.
Tomato Butter Sugo with Fettucine and Feta Serves 2 Preparation time: 45 minutes
3 tablespoons rapeseed (canola), vegetable or light olive oil 3 garlic cloves, peeled and finely sliced 14-ounce tin of chopped tomatoes ¼ teaspoon chili (hot pepper) flakes ½ onion, peeled (not chopped) 2 ounces butter (salted or unsalted) 1 teaspoon sea salt flakes, plus extra to taste pinch of sugar (optional) 5 ounces dried fettuccine 2 ounces feta
SUBSTITUTES Onion: Half a leek, banana shallot, red onion Fettuccine: Whatever pasta you have to hand Feta: Salted ricotta, Parmesan, halloumi, pecorino Chopped tomatoes: Passata (sieved tomatoes), peeled fresh in season tomatoes
First, heat the oil and garlic in a medium saucepan over a medium heat for 1–2 minutes until fragrant and beginning to golden (take care not to burn the garlic). Add the tomatoes, chili flakes, onion half, butter and salt. Bring to a simmer, then reduce over a low heat for 25–30 minutes, stirring occasionally. Splash in some water if it’s sticking or reducing too much. Remove and discard the onion, then taste the sugo for seasoning. You may want to add a pinch of sugar, depending on the acidity of the tomatoes.
After 15 minutes of the sugo simmering, bring a large saucepan of water up to the boil and cook the fettucine until al dente (around 9–10 minutes – check packet instructions for exact timing), reserving a mugful of the starchy cooking water. Using tongs, transfer the fettuccine into the tomato sauce, stirring in spoonfuls of the reserved cooking water until coated in the sauce. Taste again for seasoning (bear in mind the feta will add saltiness).
To assemble:
Divide the pasta between two plates, then finely grate over the feta to finish.
Feast Tip: Roasted or charred little gem lettuce (bibb lettuce) topped with finely grated (shredded) Parmesan and a squeeze of lemon makes a beautiful side dish to this fettucine. Throw in some nice olives, a plate of burrata drizzled with the salsa verde (see the recipe below) plus a good bottle of red and you’ve got a full-on Italian-style feast.
Salsa Verde 1 small garlic clove 1½ tablespoons capers (baby capers) in brine, drained Handful of flat-leaf parsley leaves Handful of basil leaves 2 teaspoons Dijon mustard Scant 1 cup) rapeseed (canola) or olive oil ¾ tablespoon cider vinegar ½ teaspoon salt Pinch of sugar (optional)
To make the salsa verde, mince the garlic and crush the capers with a knife. Finely chop the flat-leaf parsley and basil, then add the garlic, capers and herbs to a bowl. Stir in the mustard, oil, vinegar and salt, then taste for seasoning. If it’s too punchy and vinegary, add a small pinch of sugar.
Vietnamese-Style Iced Coffee “I became completely addicted to this way of drinking coffee on a trip to Hanoi a few years back – and as soon as summer kicks off in the UK, I get back into the swing of making them,” writes Dennison. “This isn’t a recipe as such, more of a guide for you to play around with the quantities of coffee and condensed milk to your taste. All I would recommend is to choose a coffee that’s pretty strong, to balance the sweetness of the tinned milk.”
First, divide the coffee among glasses, top up with ice and milk, then stir in a spoonful of condensed milk. Stir then taste; adding in more condensed milk if you fancy.
In case you forgot–or never knew to begin with–today is National Potato Day, giving us the kind of excuse we love to eat a lot of spuds. But along with the celebration, we should get a little education so here are some interesting facts about potatoes.
According to a survey conducted by National Today an internet site covering all the National Days in the U.S.–and there are a lot of them including National Tooth Fairy Day that’s coming up this August 22, our spud preferences are:
22% of the 1000 people surveyed said curly fries are their favorite type of French fry.
Nearly half (46%) of all people surveyed picked Lay’s as their go-to bag of potato chips. As an aside, I totally agree having unfortunately stopped by my daughter’s house where she had–and the operative word is “had”–a bag of Lay’s Classic and a carton of French Onion dip.
Slightly more than one-in-three (34%) people surveyed, chose McDonald’s as their favorite fast food restaurant when it comes to fries.
As for favorites, the number one is French fries followed by mashed potatoes, baked potatoes, hash browns and then Tater Tots (which has its own National Day on February 22).
All of this brings me to Dan Whalen who always has a bag of Tater Tots in his freezer and a propensity for writing about eclectic takes on food for his blog, “The Food in My Beard: Comfort Food, Twists & Mash-Ups,” so his publisher thought he’d be a natural to pen a cookbook on, you guessed it, tots.
“Americans love tots –those little balls of heavenly potato magic,” says Whalen in his typical enthusiastic way, noting that tots can now be found on restaurant menus. But the stats back him up. Americans consume approximately 70 million pounds of tater tots per year.
Though I’m not sure how many restaurants are devoting menu space to tots I have seen them occasionally. But Whalen, whose articles can be found in serious food magazines like Saveur, Bon Appétit, Serious Eats and Fine Cooking as well as MSNBC, and Huffington Post, has come up with some intriguing recipes, the kind you wouldn’t be ashamed of serving to guests in TOTS! 50 Tot-ally Awesome Recipes from Totchos to Sweet Po-tot-o Pie (Workman 2018; $12.95).
“I grew up eating them,” Whalen tells me when we chat on the phone. “But I wasn’t as huge of a fan as I am now. Growing up it was a lazy food, but they’ve transformed, become more modern and more interesting once chefs started doing more interesting things with them.”
Whalen has some techniques for making sure your tots are at their best.
“When cooking, turn the oven off after its preheated and they’re in the oven,” he says. “That way they’re soft and tender in the over, otherwise they turn into crunchies. Or you can pan fry them, it takes them to the next level.”
He also shares some tot history.
“What’s really cool is how Ore-Ida invented tots,” he says. “They were making French fries and were trying to figure out what to do with the leftover potato pieces besides feeding them to farm animals.”
There were mistakes along the way in creating his recipes including a meatloaf coated in a tot crust.
“It didn’t really come together for me after trying four or five times,” he says, “there was too much fat dripping out of the meatloaf and the tot crust was fragile and fell apart while I cut it.”
Despite this disappointment, he persevered and remained a big fan of tots.
“I have been continually inspired by tots though since writing the book,” says Whalen, “and have posted over 15 new tot ideas on my site since I finished the book.”
The following recipes are from his book. None of them, you should be warned, are low in calories. But you probably know that already.
The following recipes are courtesy of Dan Whalen.
Bacon Wrapped Tots
24 frozen tots
12 bacon strips
Dipping sauce(s) of your choice, for serving
Preheat the oven to 425 degrees. Set a wire rack on a rimmed baking sheet.
Cut the bacon strips in half crosswise. Wrap a piece of bacon around each tot and place each, seam-side down, on the rack.
Bake until the tots are browned and the bacon is cooked through and crispy, about 25 minutes. (The cooking time will vary depending on the thickness of the bacon, so keep your eyes on them!)
Transfer the tots to a platter, skewer each with a toothpick, and serve immediately with the dipping sauce.
1 chipotle pepper in adobo sauce, plus 1 tablespoon adobo sauce from the can
Combine all of the ingredients in the bowl of a food processor and pulse until smooth.
Chipotle mayo will keep, in an airtight container in the refrigerator, for up to 3 days.
Cheese Sauce
Yields 1 1/2 cups
1 cup whole milk
1 cup nonfat dry milk powder
1 tablespoon cornstarch
1 block (8 ounces) cheddar cheese, freshly shredded (see footnote)
1 teaspoon hot sauce
1/4 cup diced pickled jalapeños
2 teaspoons crushed red pepper flakes
Combine the milk, milk powder, and cornstarch in a large, heavy-bottomed pot over medium heat and bring to a simmer, whisking constantly. Continue to cook, whisking, until the sauce thickens, and the milk powder has dissolved, about 1 minute.
Remove from the heat and whisk in the cheese. The cheese should melt, no problem, but if it doesn’t, return the pot to low heat and whisk until it does. (Be careful with the heat at this point because the sauce could separate if heated too rapidly.)
Allow the cheese sauce to cool slightly, then stir in the hot sauce, jalapeños, and red pepper flakes. Serve warm.
Note: Preshredded cheese will not work in this recipe.
Totchos
Serves: 4
For the pico de gallo:
3 vine-ripened tomatoes, diced
1 small onion, diced
5 jalapeños, stemmed, seeded if you wish to reduce the heat, and diced
1 small garlic clove, minced or grated
1/2 cup chopped fresh cilantro leaves
Juice of 1 lime
Kosher salt
For the guacamole:
1 large avocado, halved and pitted
2 Tablespoons pico de gallo
Juice of 1 lime
Kosher salt
For the totchos:
1/4 cup vegetable or peanut oil
1 1/2 pounds frozen tots (about 65 tots)
1 1/2 cups (6 ounces) shredded Cheddar cheese
1/4 cup pickled sliced jalapeños
1/2 cup sour cream
Make the pico de gallo: Combine the tomatoes, onion, diced jalapeños, garlic, and cilantro in a small bowl. Add the lime juice and the salt to taste. Cover and refrigerate the pico de gallo until ready to use (up to 3 days).
Make the guacamole: Scoop the avocado into a medium-size bowl and mash with a fork. Add 2 tablespoons of the pico, along with the lime juice. Stir and add salt to taste. Cover with plastic wrap touching the surface of the guacamole and refrigerate until ready to use (up to 1 day).
Make the totchos: Preheat the oven to 400°F. Line a plate with paper towels.
Heat the oil in a 10-inch cast-iron skillet over medium-high heat and swirl to coat. Add the tots to the skillet in batches of about 20, so as not to crowd the pan, and cook, undisturbed, until browned on the bottom, about 3 minutes. Gently stir and toss the tots, being careful not to break them, until they are browned on all sides and crispy, about 10 minutes. Transfer the cooked tots to the prepared plate and repeat with the remaining tots.
When the final batch of tots is just about browned, pile the rest of the cooked tots back into the skillet. Top evenly with the cheese and pickled jalapeños and transfer the skillet to the oven. Bake until the cheese is melted, about 10 minutes.
Remove the skillet from the oven and top the totchos with the pico, guac, and sour cream. Serve immediately right in the skillet with a big serving spoon and plates and forks for everyone to dig in. Remember that the skillet is hot!
Variation:
To scale this recipe up for a crowd, double the pico de gallo and guacamole. Use 4 pounds of tots and divide them between 2 sheet pans (18″ x 13″). Double the cheese, pickled jalapeños, and sour cream. Follow the assembly and cooking instructions above, then dump one of the trays onto the other to form a pile.
Fajitas, that sizzling grilled seasoned meat served with salsa, tortillas and guacamole, is the result of the creativity of Mexican vaqueros who back in the early 1930s were given a tough, stringy cut of beef typically thrown away as part of the their salary for their hard work on the range. In a last laugh sort of way, these vaqueros took this tough cut known as skirt steaks and by cooking it over an open fire or on a grill and slicing it against the grain created created fajitas, a best seller now in restaurants throughout the country.
This success was propelled by Sonny Falcon,a meat market manager of Guajardo’s Cash Grocery, who in the late 1960s began selling fajitas at fairs and other popular events, ultimately becoming known as the Fajita King.
Now fajitas have their own holiday. Let’s raise a margarita in thanks to the vaqueros and to Sonny for a great job.
What’s Cooking America offers this version of Sonny’s Fajita Recipe.
Fajitas:
1 1/2 pounds skirt steak or flank steak
1 green or red bell pepper, cored, seeded, and thinly sliced
Lay the skirt steak on a cutting board and remove the outer membrane (grab the membrane with one hand and slide the knife beneath it, cutting as you go). Using a sharp paring knife, make a number of slits in the meat, cutting both with and against the grain of the meat (this cuts the muscle fiber and reduces any toughness.)
In a large plastic bag with the Lime Marinade, add skirt steak; reseal and marinate in the refrigerator at least 1 hour or overnight, turning steak occasionally.
Remove steak from refrigerator and bring to room temperature before cooking.
Preheat barbecue.
Drain steaks, reserving marinade. Place steaks on the hot grill and spoon some of the reserved marinade over the steak. Close barbecue lid, open any vents, and cook 3 to 5 minutes for medium-rare (120 degrees F. on your meat thermometer). Remove from grill and transfer to a cutting board; cut on the diagonal into thin strips.
Preheat oven to 350 degrees F. Wrap stacked flour tortillas in aluminum foil and heat in oven 15 minutes or until hot. To microwave, wrap a stack of flour tortillas lightly in paper towels and warm on high for 6 or 7 seconds per tortilla.
While the shirt steak is cooking, grill the green pepper and onion slices 1 to 2 minutes or until soft; remove from grill and place on a serving platter. Place cooked steak strips onto the same platter.
For each fajita, fill a warm flour tortilla with cooked steak strips and desired amounts of green pepper and onion slices. Add tomatoes, cheddar cheese, sour cream, guacamole, and salsa as desired; roll up like a burrito and enjoy.
Makes 4 to 6 servings.
Lime Marinade Instructions:
In a large re-sealable plastic bag, combine lime juice, vinegar, soy sauce, molasses, cilantro, garlic, cumin, and pepper; set aside.
Fascinating Facts About Fajitas
1. ‘Fajita’ Translates to ‘Little Band’ In Spanish, fajita is a diminutive for “faja”, which translates to “belt” or “girdle”.
2. It’s a humble dish Workers were given the least desirable parts of butchered steers and made fajitas from skirt steaks.
3. The term “Fajita King” is trademarked. Sonny Falcon trademarked the term after gaining popularity from the dish in the 1970s
4. McDonald’s Tried it. In 1991, McDonald’s attempted to introduce their own Chicken Fajitas into the market.
5. The original is called something different in Mexico While in the U.S we know them as fajitas, the Mexican term for grilled skirt steak is arracheras.
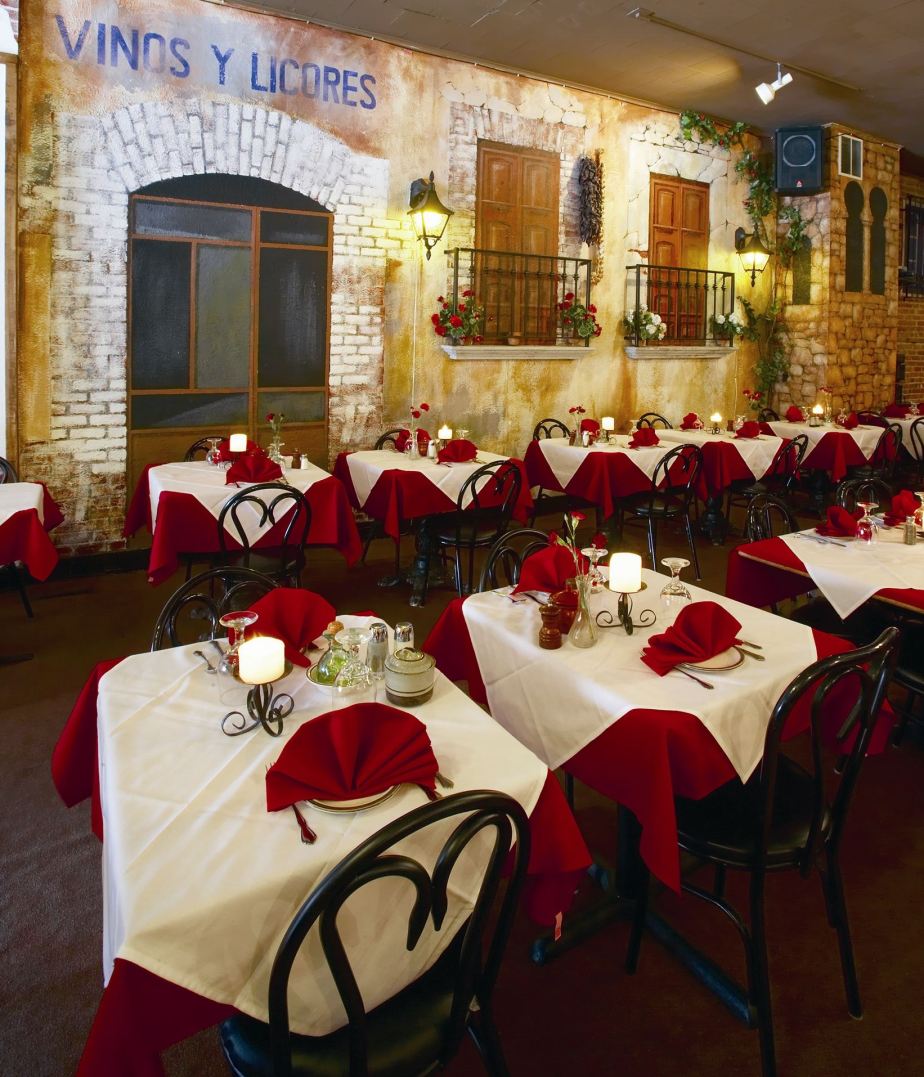
Porter County, IN – The community is invited to participate in Don Quijote Benefit Dinner to raise $20,000 to support VNA Porter County Meals on Wheels program.
Since mid-March, Meals on Wheels has seen a 57% increase in need and anticipates it will only continue to rise. In an effort to meet the need a new walk-in refrigerator is necessary to help maintain proper food prep standards for client meals.
“This is just one of the many critical needs in our community,” said Kim Olesker, president & CEO of United Way of Porter County. “We can’t thank Carlos and his team enough for helping us to raise support for homebound seniors.”
The program currently serves 300 seniors daily help maintain their nutritional well-being and is a partnership between VNA of Northwest Indiana, Pines Village Retirement Communities and United Way of Porter County.
Don Quijote’s Benefit Dinner menu will feature Chef Carlos Rivero’s signature paella with appetizer, salad, dessert and bottle of red, white or rosé wine. Traditional and vegetarian paella available.
Single and dinner for two packages available. Single dinners are $65 and dinner for two are $125. Bottle of wine option only included in dinner for two package. Dinner will be curbside pickup only on August 16 from 1 to 5 p.m. Order deadline by noon on Saturday, August 15. To purchase a dinner package, visit unitedwaypc.org/Don-Q-Dinner.
Photos courtesy of Don Quijote Restaurante.
United Way of Porter County works to lead community collaboration, unite residents and inspire action to improve lives in Northwest Indiana. United Way of Porter County annually provides more than $2.3 million to support a network of education, health, disaster and basic needs services. To learn more, visit unitedwaypc.org or follow us on Facebook and Twitter.
Dona Meche in the window of her restaurant in San Miguel de Allende. Photo by Jane Simon Ammeson.
On Calle Margarita Ledezma, not far from El Jardin Principal, the town square of San Miguel de Allende where jacaranda trees bloom, vendors come to sell their wares and even the occasional burro makes its way down the cobblestone street, Dona Meche stands at the open window of her restaurant. In front of her are colorful ceramic bowls brimming with a rich array of fillings she makes every day. What’s in each bowl varies depending upon what’s in season and available at the large open-air market not far away. Today it’s chicken with cactus and potatoes, grilled poblano peppers with mushrooms and cheese, shredded beef in a rich red adobe sauce and picadillo mixed with green beans, carrots and pureed tomatoes.
For ten pesos (approximately a dollar), Meche takes a ball of masa harina and, patting it into a thick circle, drops it into a comal of bubbling hot oil. When it’s just a little golden, she removes it from the oil and cuts a hole in the middle and adds the filling. If you want another, the process starts all over again. Order a glass of agua de Jamaica (hibiscus flower water), horchata (rice water) or guava juice for another seven pesos.
There’s your meal, simple and pleasurable–the flavors of the fillings are intense, the softness of the gordita melding the taste into a one of a kind treat.
To make gorditas at home, follow this recipe from “One Plate at Time” by Rick Bayless, cookbook author, restaurateur and TV host.
Gorditas con Carne Deshebrada 1 1/4 pounds boneless beef chuck steak, cut into 4 pieces 3 small white onions, diced 4 garlic cloves, peeled and finely chopped 1 tablespoon vegetable oil, plus oil to a depth of 1/2-inch for frying 1 (28-ounce) can good-quality whole tomatoes in juice, drained and chopped or 2 cups chopped ripe tomatoes 2 to 3 serranos or 1 to 2 jalapenos, stemmed, seeded and very finely chopped Salt 1 pound (2 cups) fresh, premixed masa 1/3 cup all-purpose flour 1 scant teaspoon baking power About 1/3 cup grated Mexican queso anejo or other dry grating cheese, such as Romano or Parmesan About 1/3 cup chopped fresh cilantro, for garnish
San Miguel Cathedral. Photo Jane Simon Ammeson.
In a medium saucepan set over medium heat, combine the meat with 2 quarts salted water, about 1/3 of the onions, and half of the garlic and simmer until the meat is very tender, about 1 1/2 hours. Strain, reserving the broth for another use.
When the meat is cool enough to handle, shred it into coarse strands with your fingers or 2 forks–don’t worry that there are bits of onion and garlic mixed with the meat.
Wash and dry the saucepan, set it over medium heat and add 1 tablespoon of the oil. When the oil is hot, add half of the remaining onions and cook until golden, about 6 minutes, then stir in the remaining garlic and cook for another minute. Add the tomatoes and chiles and cook until most of the juice has evaporated, about 3 minutes. Stir in the shredded meat and simmer for a few more minutes, then taste and season with about 1/2 teaspoon salt. Remove from the heat and set aside.
Heat a well-seasoned or nonstick griddle or heavy skillet over medium heat. Divide the masa dough into 10 portions and roll into balls; cover with plastic to keep from drying out. Line a tortilla press with 2 pieces of plastic cut to fit the plates. Gently press out a ball of dough between the sheets of plastic to about 4 inches in diameter (it’ll be about 1/4 inch thick).
Peel off the top sheet of plastic, flip the gordita, uncovered side down, onto the fingers of 1 hand, and gently peel off the second piece of plastic. Place onto the heated griddle or skillet. Bake for about 1 1/2 minutes, then flip and bake for another 1 1/2 minutes on the other side. The gordita will be lightly browned and crusty on the top and bottom, but still a little uncooked on the sides. Remove to a plate. Continue pressing and griddle-baking the remaining gorditas in the same manner.
When you’re ready to serve, warm the shredded beef. Rinse the remaining onions in a small strainer under cold water and shake to remove the excess moisture. Have the cheese and cilantro at the ready.
In a deep heavy medium skillet or saucepan, heat 1/2-inch of oil over medium to medium-high until the oil is hot enough to make the edge of a gordita sizzle sharply, about 350 degrees F on a deep-fry thermometer. One by one, fry the gorditas, turning them after they’ve been in the oil for about 15 seconds, until they’re nicely crisp but not hard, about 45 seconds total. When they’re ready, most will have puffed up a little, like pita bread. Drain on paper towels.
Use a small knife to cut a slit in the thin edge of each one about halfway around its circumference, opening a pocket. As you cut them, fill each gordita with about 1/4-cup shredded meat and a sprinkling of the onions, grated cheese, and cilantro.
Line up the filled gorditas on a serving platter and pass them around (with plenty of napkins) for your guest to enjoy.
After more than a decade of living in California, Shauna Sever resettled with her family in her home state of Illinois and rediscovered the storied, simple pleasures of home baking in her Midwestern kitchen, developing what she calls the 5 tenets of Midwest baking: Bake Big, Bake Easy, Bake with Purpose, Bake from the Past, and Bake in the Present. You may have seen Shauna discussing these tenets and sharing some of her favorite Midwest foods recently on CBS This Morning: Saturday.
As she’ll tell you: “From the Dakotas to Ohio, from Minnesota to Missouri, the Midwest is a veritable quilt of twelve states full of history, values, recipes, people, and places that make up the baking culture of the Heartland.” And with MIDWEST MADE, Sever offers bold recipes for treats we’ve come to know as all-American—from Bundt cakes to brownies—most traced to German, Scandinavian, Irish, Polish, French, Arab, and Italian immigrant families that came to call the American Midwest their home. Recipes include Swedish Flop, Polish Paczki, Danish Kringle, German Lebkuchen, Candy Bar Baklava, Ozark Skillet Cake, Cleveland-Style Cassata Cake, Nebraskan Runzas, Apricot and Orange Blossom Kolacky, Dark-Chocolate Pecan Mandelbrot, Marshmallow Haystacks and so much more…
Here’s one that you’ll be sure to love.
Honeyed Raspberry and White Chocolate Cream Pie Serves 8 to 10 From the outset, this pie appears to be one of those floaty, feminine food things, because it’s just so dang pretty. However! The fluff factor here—a cloud of white chocolate cream, bolstered by cream cheese—is quickly tempered by the thick raspberry layer beneath it, sharp and nubbly with all those nutty little berry seeds, which I happen to love. The mix of cooked and raw berries help to intensify the raspberry flavor, making you wonder: why there aren’t more raspberry pies out there, anyway?
Midwest Made by Shauna Sever.
CRUST: 2 ounces/57 g high-quality white chocolate, chopped 1 tablespoon heavy whipping cream 1 single batch My Favorite Pie Crust (see recipe at bottom), blind baked and cooled FILLING: 2/3 cup/132 g granulated sugar 1/4 cup/32 g cornstarch 1/4 teaspoon fine sea salt 1 cup/225 g lukewarm water 3 tablespoons/63 g honey 1 teaspoon freshly squeezed lemon juice 4 cups/500 g fresh raspberries, divided 1 tablespoon unsalted butter TOPPING: 1 cup/240 g heavy whipping cream, very cold 1 teaspoon pure vanilla extract 1/4 teaspoon pure almond extract 4 ounces/113 g full-fat cream cheese 4 ounces/113 g high-quality white chocolate, melted and cooled
Prepare the crust: Combine the white chocolate and cream in a small, microwave-safe bowl. Microwave with 20-second bursts on medium, stirring until smooth. Spread evenly over the bottom of the cooled crust. Allow to set at room temperature.
In a 3- to 4-quart/2.8 to 3.75 L saucepan, whisk together the sugar, cornstarch, and salt until lumpfree. Whisk in the lukewarm water, honey, and lemon juice. Add 2 cups/250 g of the raspberries. Cover and set the pan over high heat. Bring to a boil, stirring occasionally. Once the berries begin to break down and the mixture is slowly bubbling all over the surface like lava, cook for 2 timed minutes, stirring often. Stir in the butter. Remove the pan from the heat and let cool completely, about 1 hour.
Prepare the topping: In the bowl of an electric mixer fitted with the whisk attachment, whip the cream with the vanilla and almond extract until stiff peaks form. Transfer the whipped cream to a clean bowl. Swap out the whisk attachment for the paddle. Add the cream cheese and melted white chocolate to the mixer bowl (no need to clean it). Beat on medium speed until smooth and creamy. Gently stir about a third of the whipped cream into the cream cheese mixture to lighten it, then carefully fold in the remaining whipped cream.
Assemble the pie: Scatter 1 cup of the remaining berries over the bottom of the crust. Spoon the raspberry filling over them, then add the remaining berries on top. Pipe or dollop the white chocolate cream topping over the pie, leaving a 1-inch/2.5 cm border of the ruby red filling all around the edges. Refrigerate for at least 3 hours to set. Let soften at room temperature for about 20 minutes before serving.
My Favorite Pie Crust Pie crust purists will likely object, but I’m a big believer in using a food processor for pie crust making. If you don’t overdo it, it just doesn’t get any easier or faster.
We’ve all heard a thousand times that keeping the fat as cold as possible is the key to great pie crusts, and that’s certainly a great tip. But I add a few pinches and splashes that I consider insurance, for when the kitchen is hot or I’m distracted by any number of children or things. Vinegar is great for tenderness: I like red wine vinegar, but cider vinegar is good, too. A little pinch of baking powder makes a flakier crust a little more foolproof in case you happen to overwork the dough (happens to the best of us). For a crust with a savory filling, I include the smaller amounts of sugar as listed here for flavor and browning. For sweet pies, use 1 or 2 tablespoons, as you like.
SINGLE MAKES: 1 (9- or 10-inch/23 or 25 cm) round bottom pie or tart crust 11/3 cups/170 g unbleached all-purpose flour, spooned and leveled 1 teaspoon to 1 tablespoon granulated sugar (see headnote) 1/2 teaspoon fine sea salt 1/8 teaspoon baking powder 1/2 cup/113 g very cold unsalted butter, cubed 1/4 cup/57 g ice water 11/2 teaspoons red wine vinegar SPECIAL NOTES > Pat the finished dough into a round disk before wrapping and chilling to make rolling it into a circle later much easier.
DOUBLE
MAKES: 1 (9- or 10-inch/23 or 25 cm) round double-crusted or lattice-topped pie 22/3 cups/340 g unbleached all-purpose flour, spooned and leveled 2 teaspoons to 2 tablespoons granulated sugar (see headnote) 1 teaspoon fine sea salt 1/4 teaspoon baking powder 1 cup/225 g very cold unsalted butter, cubed 1/2 cup/113 g ice water 1 tablespoon red wine vinegar SPECIAL NOTES > Divide the dough in half before shaping and wrapping. For a lattice top, make one disk slightly larger for the bottom crust.
SLAB MAKES: 1 (10 x 15-inch/30 x 43 cm) slab pie 51/3 cups/680 g unbleached all-purpose flour, spooned and leveled 4 teaspoons to 4 tablespoons granulated sugar (see headnote) 2 teaspoons fine sea salt 1/2 teaspoon baking powder 2 cups/453 g very cold unsalted butter, cubed 1 cup/225 g ice water 2 tablespoons red wine vinegar
SPECIAL NOTES: Make the dough in 2 batches (2 recipes of the doubled recipe, left), for the top and bottom crusts. Shape and wrap each batch separately.
METHOD: In the bowl of a food processor, combine the flour, sugar, salt, and baking powder. Pulse a few times to blend. Sprinkle half of the butter pieces over the dry ingredients. Process until the mixture resembles cornmeal, about 15 seconds. Add the remaining cold butter and pulse about 10 times, until this batch of butter cubes is broken down by about half.
In a measuring cup, combine the water and vinegar. Add about three quarters of the liquid to the bowl. Pulse about 10 times, or until the dough begins to form a few small clumps. Test the dough by squeezing a small amount in the palm of your hand. If it easily holds together and your palm isn’t dusty with floury bits, it’s done. If not, add an additional 1/2 tablespoon of vinegared water and pulse 2 or 3 more times. Repeat this process as needed just until the dough holds together. Turn out the mixture onto a work surface. With a few quick kneads, gather the dough into a mass.
For a single crust, pat the dough into a disk, wrapping tightly in plastic wrap. For double crust, divide the dough in half and shape into disks. For 2 slab crusts, shape each half of the dough into a 5 x 8-inch/12.5 x 20 cm rectangle. Refrigerate for at least 2 hours before rolling. TIP > The dough will keep tightly wrapped in the fridge for up to a week, and in the freezer for up to 6 months.
Great news for those who love this lovely city–the dining rooms and terraces of Montréal’s wonderful restaurants are now open. It’s time to sample the culinary delights of the recently re-opened Experience Old Montréal restaurants (note that each restaurant makes a determination as to how many patrons can be served both inside and outside in order to respect the two-metre physical distancing rules, unless the patrons come from the same private residence or there is a physical barrier between them). Many Montréal restaurants continue to offer takeout and delivery service. Bars have been allowed to reopen since June 25, although they must respect the same sanitary protocols as restaurants and patrons must be seated – no dancing or standing at the bar. All bars must now close at midnight.
For those new to this beautiful historic section of the city, this is the perfect change to explore some of the most beloved restaurants and bars in Old Montreal. Not matter what meal– breakfast, lunch, dinner or brunch or what cuisine–French brasserie or bistro, Italian and pizza, Japanese izakaya and sushi, along with some of the best steaks in Montreal–it’s all there. Montreal bars are also perfect for a night out for drinks with friends or your office happy hour!
Enjoy the steaks and patio dining at Vieux-Port Steakhouse; the Paris-inspired menu from the Golden Age of French brasseries at Brasserie 701,
Dine overlooking the Saint-Lawrence River at Taverne Gaspar located on de la Commune Street, right next to the Auberge du Vieux-Port.
Gaming establishments like the Casino de Montréal and its restaurants such as Ajia, L’Atelier de Joël Robuchon and Pavillon 76 and will hopefully be opening soon. L’Instant, the deli, is scheduled for opening on August 3.
For jazz there’s the atmospheric Modavie, the city’s hottest jazz bar and bistro. Enjoy live music while dining and stay for a drink or two to continue enjoying the sounds of some the best jazz musicians around.
History and elegance combine at L’Auberge Saint-Gabriel with its arched stone entrance and glossy red facade. Built in built in 1688 by a French soldier, it was the first auberge (the French term for inn) in North America to receive a liquor licence, on March 4, 1754. Specializing in French and Quebecois and just steps away from the Notre–Dame Basilica, it’s location and style–stone walls and rich materials creates that wonderful sense of being in Old Paris when dining here.
To get in the mood to visit the restaurants of Old Montreal, may we suggest cooking a classic cassoulet as a start. So turn on your favorite jazz riffs, open a bottle of French wine, prepare the meal and, oh yes, most importantly, book a flight to Montreal.
The following is adapted from a recipe by Thomas Keller, Chef/Owner of the famed The French Laundry.
Photo courtesy of Williams Sonoma.
Thomas Keller’s Slow-Cooker Cassoulet
4 lb. boneless pork shoulder, cut into 8 pieces and trimmed of excess fat
Kosher salt and freshly ground pepper, to taste
2 Tbs. canola oil
1 cup panko
4 oz. thick-cut bacon, cut crosswise into 1/2-inch strips
4 cups coarsely chopped yellow onions (about 3 medium onions)
2 cups dry white wine, such as Sauvignon Blanc
1/4 cup tomato paste
1 can (35 oz.) peeled Italian plum tomatoes, drained and coarsely chopped
2 cups chicken broth
12 cups cooked Great Northern beans or other small white beans, drained
6 fully cooked or smoked chorizo or garlic sausage links, about 1 1/2 lb. total, each halved on the diagonal
1 garlic head, halved crosswise
1/4 cup chopped fresh flat-leaf parsley, plus more for garnish
1 lb. baguette, cut into 1/2-inch-thick slices
Extra-virgin olive oil for brushing
Coarse sea salt, such as sel gris, for garnish
Season the pork generously with kosher salt and pepper; set aside.
In the stovetop-safe insert of a slow cooker over medium-high heat, combine the canola oil and panko. Cook, stirring constantly, until the panko is toasted and golden, 4 to 6 minutes. Transfer the panko to a baking sheet and season with kosher salt and pepper.
Add the bacon to the insert and cook until crisp on both sides, about 5 minutes. Drain on paper towels. Reserve the bacon fat in the insert.
Add half of the pork to the insert and brown on all sides, 7 to 8 minutes total. Transfer to a platter. Repeat with the remaining pork.
Add the onions and 1 tsp. kosher salt to the insert and cook, stirring occasionally, until golden brown and softened, about 7 minutes. Add the wine and simmer until reduced by half, about 8 minutes. Stir in the tomato paste, tomatoes and broth. Remove the insert from the heat and add the beans, pork, chorizo and garlic.
Place the insert on the slow-cooker base, cover and cook on low until the pork pulls apart easily with a fork, 9 to 10 hours. Skim off the fat, and remove and discard the garlic. Fold in the panko and the 1/4 cup parsley. Adjust the seasonings with kosher salt and pepper.
Position a rack in the lower third of an oven and preheat the broiler.
Brush the baguette slices with olive oil. Arrange the slices, oiled side up, on top of the cassoulet, overlapping them. Broil until golden brown, 4 to 6 minutes.
Let the cassoulet stand at room temperature for about 30 minutes before serving. Sprinkle each serving with the reserved bacon, sea salt and parsley. Serves 8 to 10.
Separately, cheese and cake are among my favorite food groups and, I will hazard a guess, of those around the world. Combined, their rich flavors are amazing and the reason why cheesecake is celebrated every year on July 30. But before we get into how to make cheesecake, courtesy of recipes from King Arthur Baking Company, one of the oldest businesses in the country having been founded in 1790 in Boston, Massachusetts, by Henry Wood. At the time, according to the company’s history, there were 13 states in the new United States. George Washington was America’s first president. And Henry Wood began importing flour from England, establishing his business at Boston’s Long Wharf. Henry Wood & Company, the original ancestor of King Arthur Baking Company, was the first flour company in the young United States — and first food company in New England.
Maple Cream Pie. Photo and recipe (see below) courtesy of King Arthur Flour, now the King Arthur Baking Company.
HISTORY OF NATIONAL CHEESECAKE DAY
Cheesecake can be traced back to ancient Greece though the recipe then consisted of such ingredients as cheese, flour, and honey and was a dish fed to the Greek athletes during the 776 B.C. The recipe stayed basically the same until around the time the Romans conquered Greece, adding eggs to the list of ingredients and baking the mixture into a cheese-like cake.
In 1872, New York dairyman William Lawrence unintentionally came up with cream cheese while he was trying to replicate a creamy white cheese made from whole or partly skimmed milk called Neufchâtel as it originated from Neufchatel, France. He instead ended up with cream cheese but that was okay because it became so popular and the demand for it so high that it was packaged and distributed to local stores in the area. Intriguingly, cream cheese is now a big hit in France.
The next advance for cheesecake came about when Arnold Reuben, a German immigrant living in New York ate a cheese pie. He liked the dessert so much, that he experimented until he came up with what we think of as New York Cheesecake. The difference between the New York-style and others is the use of heavy cream and eggs which produces a dense, velvety and smooth consistency that is then nestled into a shortbread crust.
Company headquarters in Norwich, Vermont. Photo courtesy of King Arthur Baking Company.
The popularity of the New York Cheesecake increased so much that different cities came up with their own versions such as Chicago and Pennsylvanian cheesecakes. All these cheesecakes became so embedded in America’s culinary culture that in 1985, July 30 was designated as National Cheesecake Day.
New York Cheesecake (see recipe below). Photo courtesy of King Arthur Baking Company.
Maple Cream Pie By Gwen Adams
Crust 6 tablespoons unsalted butter, softened 3 ounces cream cheese, softened 1 1/4 cups King Arthur Unbleached All-Purpose Flour 2 teaspoons granulated sugar 1/8 teaspoon salt Filling 3 cups half & half 1/2 cup maple syrup 4 large egg yolks 1 cup brown sugar 1/3 cup cornstarch, sifted 1/4 teaspoon salt 1 teaspoon vanilla extract 1/4 teaspoon maple flavor, optional Whipped cream 1 cup heavy cream 1 teaspoon vanilla extract 2 tablespoons confectioners’ sugar
To make the crust: Mix the butter and cream cheese until well blended. Add the flour, sugar, and salt; mix until just blended. Pat into a disk, wrap, and refrigerate for at least 30 minutes.
Preheat the oven to 375°F.
Roll the dough on a floured surface until it’s 12″ in diameter. Place it into a 9″ pie pan. Shape and crimp the crust. Line the crust with aluminum foil and pie weights or uncooked beans. Bake it until the bottom inside surface is light brown, approximately 20 minutes. remove the crust from the oven, carefully lift the foil and weights out, and allow it to cool while you make the filling.
To make the filling: Mix the half & half, maple syrup, egg yolks, brown sugar, cornstarch, and salt in a medium saucepan. Cook over medium heat, stirring constantly, until the mixture boils and thickens, about 10 to 12 minutes.
Remove from the heat and add the maple flavor and vanilla.
Pour the filling into the cooled pie shell. Cover and refrigerate for at least 4 hours, preferably overnight.
Roll the chilled, rested dough to a 12″ to 13″ circle and fit it into the pan. Trim and flute the edge, then put the lined pie pan in the refrigerator for 20 minutes, while you preheat the oven to 425°F.
To pre-bake the crust: Prick the crust all over with a fork. Line it with parchment paper or a basket-style coffee filter, and fill with pie weights or dried beans. Bake the crust for 20 minutes, then remove it from the oven. Remove the liner and weights or beans, and brush the crust all over with the beaten egg mixture. Return it to the oven and bake for 3 more minutes. Remove it from the oven and lower the temperature to 350°F.
To make the filling: Whisk together the sugar, syrup, eggs, bourbon, fresh ginger, ground ginger, and salt. Sprinkle the pecans and mini diced ginger into the pie crust, and pour the filing mixture over them.
To bake: Place the pie on a parchment- or foil lined baking sheet, and bake for 25 to 30 minutes, until the filling has set and is slightly wobbly in the center. Remove it from the oven and cool it on a rack completely before serving.
For the whipped cream: Whisk the heavy cream and vanilla until stiff peaks form. Whisk the sugar into the whipped cream. Generously dollop on to individual slices of pie.
Tips from King Arthur Bakers We recommend using only real maple syrup in this recipe. The imitation stuff just isn’t strong enough and will result in a pie with minimal flavor.
King Arthur Flour. 2012. Justin Cash Photography
Bourbon Ginger Pecan Pie
Crust Filling 1 recipe Classic Single Pie Crust 1 large egg, beaten with 1 tablespoon water 3/4 cup dark brown sugar, packed 1/2 cup Grade A very dark maple syrup (cooking maple syrup) 3 large eggs, lightly beaten 3 tablespoons good bourbon, optional 2 teaspoons finely grated fresh ginger 1 teaspoon ginger 1/4 teaspoon sea salt 1 1/2 cups pecan pieces 1/4 cup mini diced ginger
To make the crust: Grease and flour a 9″ pie pan.
Roll the chilled, rested dough to a 12″ to 13″ circle and fit it into the pan. Trim and flute the edge, then put the lined pie pan in the refrigerator for 20 minutes, while you preheat the oven to 425°F.
To pre-bake the crust: Prick the crust all over with a fork. Line it with parchment paper or a basket-style coffee filter, and fill with pie weights or dried beans. Bake the crust for 20 minutes, then remove it from the oven. Remove the liner and weights or beans, and brush the crust all over with the beaten egg mixture. Return it to the oven and bake for 3 more minutes. Remove it from the oven and lower the temperature to 350°F.
To make the filling: Whisk together the sugar, syrup, eggs, bourbon, fresh ginger, ground ginger, and salt. Sprinkle the pecans and mini diced ginger into the pie crust, and pour the filing mixture over them.
Company Headquarters. Photo courtesy of King Arthur Baking Company.
To bake: Place the pie on a parchment- or foil lined baking sheet, and bake for 25 to 30 minutes, until the filling has set and is slightly wobbly in the center. Remove it from the oven and cool it on a rack completely before serving.
New York Cheesecake
Crust 1 1/2 cups King Arthur Unbleached All-Purpose Flour 1/3 cup sugar 1/4 teaspoon salt 8 tablespoons unsalted butter, softened 1 large egg, at room temperature
Filling 2 pounds (four 8-ounce packages) cream cheese, at room temperature 1 3/4 cups sugar 3 tablespoons King Arthur Unbleached All-Purpose Flour zest of 1 lemon 1/4 teaspoon salt 1 teaspoon vanilla extract 5 large eggs, at room temperature 1/2 cup sour cream, at room temperature Fruit glaze 1 or 2 14.5 ounce cans of tart cherries in water, or 4 cups fresh or frozen fruit* 1 cup (water 1/2 cup granulated sugar 1 1/2 to 2 tablespoons cornstarch 3 drops red food coloring, optional
*Using 2 cans of cherries will give you enough leftover fruit to serve alongside individual slices.
Preheat the oven to 400°F. Lightly grease a 10″ springform pan.
To make the crust: In a mixing bowl with a paddle, combine the flour, sugar, salt, and butter. Mix until the mixture is crumbly, then add the egg and continue to mix until a soft dough forms. Press the dough on the bottom and an inch up the sides of the prepared pan; prick it all over with a fork, and bake for 15 minutes, until light golden brown. Remove from the oven and cool to room temperature. Reduce the oven temperature to 325°F.
To make the filling: Place the cream cheese in a large mixing bowl with a paddle. Add the sugar and flour, and mix at low speed until there are no lumps. Scrape the bottom and sides of the bowl at least twice during this process, to be sure no cheese is sticking.
Add the lemon zest, salt, and vanilla, and mix to combine. Add the eggs, one at a time, mixing until incorporated and scraping the mixing bowl between additions. Stir in the sour cream. Pour the filling over the crust and bake for 45 to 50 minutes, until the edges of the cake
are set one inch in from the edge. The middle should still jiggle when you nudge the pan; in fact, the cake will look underbaked. Measure the temperature of the cake an inch from the edge: when it reaches 175°F, turn off the oven. Prop open the door, and let the cheesecake cool slowly in the oven for 1 hour. During this time the center will finish setting. Cooling the cake slowly will keep the top from cracking and ensure a smooth, even texture inside.
Photo courtesy of King Arthur Baking Company.
To make the glaze: Whisk together the water, sugar, and cornstarch in a medium saucepan until the cornstarch dissolves. Place over medium heat and cook, stirring constantly, until the mixture boils, becomes clear, and thickens. Remove from the heat and add the food coloring and the drained cherries. Let the mixture cool to room temperature, then spoon it over the cooled cheesecake. Refrigerate the cake until you’re ready to serve.
King Arthur Flour, now King Arthur Baking Company, is an employee-owned company that first opened in 1790. Every one of their employees are bakers at heart and are described in the company’s literature as being for generations there with you as you bake. King Arthur Baking Company’s mission is to be the ultimate resource and inspiration in the kitchen, to inspire connections and community through baking, and to use our business as a force for good.
Creating artisanal ice for large scale events, private clients and parties in Los Angeles is a continuation of Leslie Kirchhoff’s career as an artist, DJ and photographer for high-end magazines like Vogue. Feeling a little stifled and less than creative in her day-to-day work doing magazine shoots, she hit upon the idea of ice cubes as works of art–albeit not very permanent ones. She also realized that while putting large ice cubes in drinks was trendy, putting something in the ice cube itself wasn’t being done. Using that as a springboard she started Disco Cubes, where she creates handcrafted ice so beautiful and/or unique that it turns a mere cocktail into a showpiece.
“The cube itself is just the container for whatever you put inside, like a tiny 3-dimensional blank canvas where gravity doesn’t quite exist,” says Kirchhoff who describes great cocktails as similar to multi-sensory sculptures. “Mixologists are truly becoming artists, much like chefs have become. You have the architectural elements, like the shape and texture of the glassware, the color and clarity of the drink. Every element is so carefully calculated that it’s a wonder why more people aren’t experimenting with ice.”
Now Kirchhoff is sharing her ice cube recipes in the recently released Disco Cube Cocktails: 100+ innovative recipes for artful ice and drinks. The name Disco harkens to both a renewed interest in the designs, clothing and aesthetics of that era as well as her own work as a DJ. Kirchhoff also is very much influenced in her ice works by Danish designer Verner Panton who she describes as an inventor as well and the first to make a single-form injection-molded chair.
I just love everything about him,” she says, impressed by Panton’s ability to find a balance between the weird and the practical while have fun doing so.
A perfectionist when it comes to cubes, Kirchhoff also read up on the physics of freezing and talks about polishing ice cubes to make them perfect. In other words, Disco Cubes isn’t just cracking open an ice cube tray or putting a glass under the dispenser on the refrigerator.
Some of her recipes have multiple steps and include ingredients we’re not likely to have on hand. Others are simpler and those are the ones I’m starting off with here. If you like them and want to go more experimental, I’ve included the more complicated ones at the end.
HERBAL SPEARS Makes 4 Spears 4 fresh herb sprigs [about 4 inches long] 5¼ in clear Collins cube mold
Place one herb sprig into each Collins cube compartment. Fill the mold with water and freeze until solid, about 30 hours. Remove the cubes from the mold, polish them, and keep frozen until ready to use. Polishing Cubes As with metal that needs polishing or wood that needs sanding, ice sometimes needs a little love before it’s ready for its close-up. Cubes may have seams from two-part molds, lumpy tops, or other imperfections you want to smooth out. This process must be done quickly, especially in a warm environment. Shaping Herbal Spears A sharp paring knife can easily skim off the seam from an ice sphere. Hold the cube with a microfiber cloth in one hand, while carefully carving with the knife facing toward you, rotating the sphere away from you as you go.
HOT SAUCE SHATTER These are easy to make and can be used in drinks such as Bloody Marys, Margaritas and Michelada (chilled Mexican beer mixed with other ingredients such as lime juice and Worcestershire sauce) that require spicing up. Makes Enough for 10 to 15 Drinks 1 ounce hot sauce 2 cups water Quarter sheet pan, to use as ice mold
In a glass measuring cup, combine the hot sauce with 2 cups of water. Place a quarter sheet pan in the freezer, and carefully pour the hot sauce mixture directly into the pan. Freeze until solid, about 2 hours. Pop the entire sheet of ice off the tray and transfer to a 1 gallon freezer bag until ready to use. When ready to serve, with the ice still in the bag, shatter it into various-size pieces [anywhere from 1 to 4 inches, or 2.5 inches in length] using a mallet or rolling pin.
HOLIDAY PUNCH + ROSEMARY WREATH You don’t have to wait until the holidays to serve this one. It can be a cool summer drink as well. Makes 24 Servings Four 750 ml bottles prosecco, chilled 24 ounces Peppered Cranberry Syrup (see recipe below) 16 ounces vodka ¾ ounce orange bitters 1 Rosemary Wreath (see recipe below)
In a large punch bowl, combine the prosecco, cranberry syrup, vodka, and bitters. Stir to mix. Gently add the ice wreath and serve. Peppered Cranberry Syrup Makes About 24 Ounces 4 cups cranberries [two 12 ounce packages] 1 cup sugar 4 ounces apple cider vinegar 2 tablespoons peppercorns, coarsely cracked
In a large saucepan over medium-high heat, combine the cranberries, sugar, apple cider vinegar, and peppercorns with 3 cups of water. Bring to a boil, reduce the heat to low, cover, and simmer for 10 minutes. Remove from the heat and let cool. Refrigerate the mixture for at least 6 hours, or overnight. Strain it twice through a fine-mesh sieve into a bowl and refrigerate in an airtight container until ready to serve, or for up to 1 week. Rosemary Wreath Makes 1 Ice Wreath 1 tablespoon dried hibiscus flowers One 8 cup Bundt pan 1 or 2 bunches rosemary sprigs
In a large heatproof glass measuring cup, steep the hibiscus flowers in 32 ounces of hot water for 5 minutes. If using a silicone Bundt pan, place it on a quarter sheet pan. Arrange the rosemary sprigs in a wreath shape inside the pan. Through a fine mesh strainer, pour the hibiscus tea into the mold, then add 2 cups of water. Use the sheet pan to transfer the mold to the freezer and freeze until solid, about 8 hours, or overnight. DR. DRAGON + RADISH CUBES Makes 2 Cocktails 2 Radish Cubes 2 cucumber strips 4 ounces Miso Butter Washed Suntory (see recipe below) 1½ ounces freshly squeezed lemon juice ¾ ounce Radish Simple Syrup (see recipe below)
Place 1 Radish Cube in each of two Old-Fashioned glasses to temper. Add 1 cucumber strip to each glass, circling the cube and touching the side of the glass. In a cocktail shaker filled with plain ice, combine the whisky, lemon juice, and radish simple syrup. Cover and shake for 15 seconds, then double strain into the glasses. Radish Cubes Makes 4 Cubes 4 micro radishes, or small red radishes, stems trimmed so total size is about 2½ inches 2-inch clear ice cube mold Place 1 radish in each compartment of the clear cube mold. Fill the mold with water and freeze until solid, about 30 hours. Remove the cubes from the mold, polish them, and keep frozen until ready to use. Miso Butter Washed Suntory Makes 2 Cups 4 ounces unsalted butter 1 teaspoon sweet white miso paste (can substitute soy sauce instead) 2 cups Suntory whisky (or other bourbon)
In a small pan set over medium heat, melt the butter. Whisk in miso paste to combine. Remove from heat and let cool slightly. Combine the melted miso butter and bourbon in a lidded wide-mouth container, then cover and shake briefly to combine. Let sit at room temperature for at least 2 hours, then transfer to the freezer for at least 6 hours or overnight. Remove the hardened butter from the top of the bourbon and set aside, then strain the mixture through a coffee filter set inside a sieve and into another lidded jar. Store infused bourbon in the refrigerator for up to a month. Radish Simple Syrup* Makes about ¾ Cup ½ cup sugar ½ cup thinly sliced radishes
In a small saucepan over high heat, combine the sugar and ½ cup of water. Heat, stirring, until the sugar dissolves. Remove from the heat and add the radishes. Cover and let steep at room temperature for at least 2 hours, then strain through a fine-mesh sieve into a lidded jar or bottle. *Beware the pungent smell of making this simple syrup. SOUL MAKOSSA + TANGERINE TURMERIC CUBES “In 1973, Manu Dibango brought an infec¬tious groove from Africa to the dance floors of downtown New York City with his mas¬sive global hit, “’Soul Makossa,’ which flew off shelves so quickly that even DJs had a hard time getting their hands on a copy,” says Kirchhoff. “The infectious sax riff and vocal chant were covered, sampled, and famously ripped off time and time again, most notably by Michael Jackson in ‘Wanna Be Startin’ Somethin’. With these cubes you’ll have a party in your glass faster than you can say ‘ma-mako, ma-ma-sa, mako-mako ssa.’” Makes 1 Cocktail 1 Tangerine Turmeric Cube (see recipe below) 2 ounces tequila Soda water or tonic water, for topping off 3 dashes Angostura bitters Lime wheel, for garnish
Place the Tangerine Turmeric Cube on a cutting board and using a serrated knife cut it diag¬onally through the middle. Place both halves into a white wine glass or Old-Fashioned glass. Pour the tequila over the top, then top with soda or tonic water, bitters, and lime wheel. Tangerine Turmeric Cubes Makes 4 Cubes 8 ounces freshly squeezed tangerine juice, strained 2 ounces fresh turmeric juice, strained (see note below) 2 ounces Honey Simple Syrup (see below) 12 dashes of orange bitters Collins cube tray
In a large glass measuring cup, combine the tangerine juice, turmeric juice, simple syrup, and orange bitters. Pour the mixture into the tray and freeze until solid, about 4 hours. Simple Honey Syrup 1 cup water 1 cup honey
Combine water and honey in a small saucepan. Bring to a boil over medium-high, stirring constantly until honey dissolves. Remove from heat and let cool about 30 minutes until it is at room temperature. Store refrigerator in airtight container, it should keep for up to 2 weeks. Note: Turmeric juice can be found locally at Apple Valley Market in Berrien Springs and GNC in Benton Harbor or if you don’t want to buy it then consider mixing a little ground turmeric with carrot or orange juice. The above recipes are reprinted from Disco Cubes by Leslie Kirchhoff with permission by Chronicle Books, 2020. Jane Ammeson can be contacted via email at janeammeson@gmail.com or by writing to Focus, The Herald Palladium, P.O. Box 128, St. Joseph, MI 49085.